Kitchen cabinet removal is one of the first and most critical steps in any kitchen renovation or furniture disposal project. Whether you’re replacing cabinetry, salvaging units for reuse, or preparing your kitchen for a full remodel, knowing how to safely and efficiently remove cabinets is essential.
This guide walks you through every step of removing different types of cabinets—wall-mounted units, floor (base) cabinets, and standalone cupboards. It’s tailored for DIY enthusiasts, homeowners planning renovations, and professionals seeking best practices in cabinet dismantling.
You’ll also learn about the tools required, how to prevent wall and floor damage, and what disposal options exist, particularly for homeowners in locations like St Albans where council-based waste programs are available.
Tools and Safety Checklist
Before you begin the removal process, ensure you have the correct tools and safety gear. Having everything ready at the outset prevents unnecessary delays and minimizes the risk of damaging surrounding fixtures or injuring yourself.
Essential Tools
- Screwdrivers (flathead and Phillips): for detaching cabinet screws
- Cordless drill: speeds up unscrewing and detachment processes
- Utility knife: useful for cutting through caulk or sealant
- Pry bar or crowbar: to remove nailed or glued panels
- Adjustable wrench or pliers: for plumbing connections in sink cabinets
- Oscillating multi-tool (optional): for cutting through wood or adhesive if cabinets are firmly glued or nailed
Safety Equipment
- Safety goggles: protect your eyes from falling debris and dust
- Work gloves: essential for handling sharp edges and heavy materials
- Dust mask or respirator: recommended if cutting into older walls or dealing with deteriorated materials
- Closed-toe shoes: sturdy footwear protects against dropped tools or cabinet parts
Preparation Steps
Turn off electricity and water supply: Shut off the power and water if your cabinet removal involves areas near electrical wiring or plumbing. This is essential for maintaining a safe work environment and preventing accidents.
Empty all cabinet contents: Remove all items from inside the cabinets to avoid damage and ensure clear access during the dismantling process.
Protect kitchen surfaces: Cover countertops, floors, and appliances using durable sheets or drop cloths. This safeguards your surfaces from scuffs, stains, and debris as you work.
Section 2: Understanding Cabinet Types
Not all kitchen cabinets are created equal, and identifying the type of unit you’re dealing with helps determine the safest and most efficient removal method.
Wall-Mounted Cabinets
These are installed above countertops and secured with screws or brackets into wall studs. They typically require a second person to support the unit while it’s being detached.
Base (Floor) Cabinets
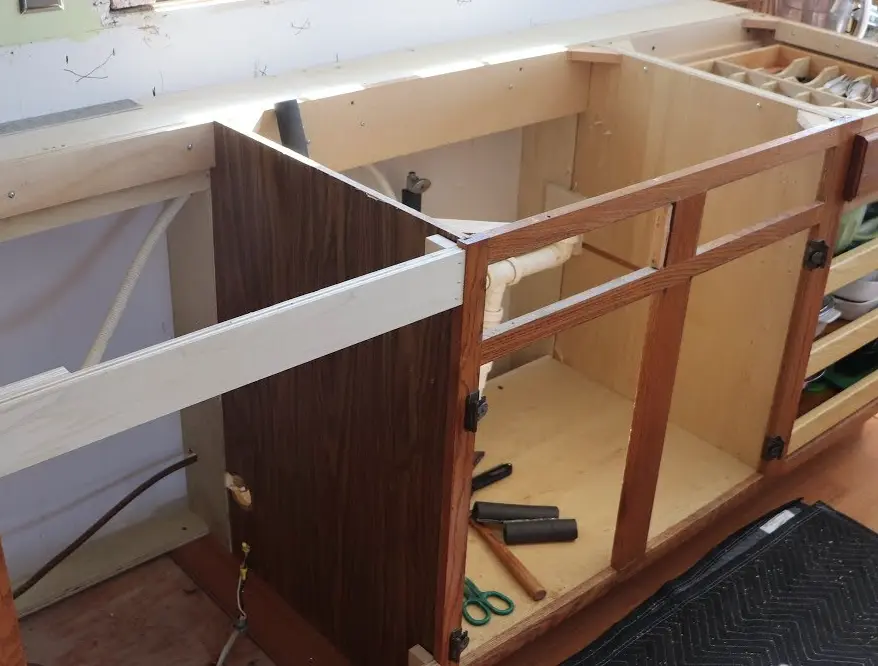
These sit on the floor and may include plumbing, especially beneath sinks. They can also be attached to wall studs or subfloors with brackets or screws.
Cupboards and Modular Units
Often standalone or loosely fixed, cupboards may be nailed into position or attached with basic screws. Their removal is usually easier, but damage to trim and walls is still possible.
Framed vs. Frameless Cabinets
Framed cabinets have a front face structure which adds rigidity; frameless (European-style) cabinets are simpler boxes. The construction style affects how pieces are joined and how force must be applied during dismantling.
Section 3: How to Remove Wall-Mounted Kitchen Cabinets
Wall cabinets are often the trickiest to remove due to their elevation and weight. Follow these steps to avoid damaging the wall or injuring yourself.
Step-by-Step Instructions
- Clear the Area: Remove everything from inside the cabinets and the surrounding surfaces.
- Turn Off Utilities: If the cabinet includes lighting or is near power lines, cut off electricity at the breaker.
- Locate Mounting Hardware: Open the cabinet doors and identify screws or brackets connecting it to the wall studs.
- Support the Cabinet from Below: Use a cabinet jack, step ladder, or a second person to bear the weight during unscrewing.
- Unscrew Carefully: Begin with the bottom screws while keeping the top ones in place until the end for stability.
- Remove Cabinet: Once all screws are removed, tilt and lift the unit away from the wall gently.
Additional Tips
- If the cabinet is caulked to the wall, score the seam with a utility knife before detachment.
- For units with crown molding or trim, remove these elements separately using a pry bar and hammer to prevent splintering.
Section 4: How to Remove Floor Cabinets
Floor or base cabinets are typically attached to both the floor and the wall, and may house plumbing fixtures.
Step-by-Step Instructions
- Disconnect Plumbing: For sink cabinets, turn off the water supply and detach pipes using a wrench.
- Detach from Wall and Floor: Look for screws anchoring the cabinet to the wall or subfloor. Use a drill or screwdriver to remove them.
- Cut Through Sealant or Adhesive: Use a utility knife or multi-tool to slice through any caulk lines between the cabinet and floor/wall.
- Lift and Remove: With all fasteners detached, carefully lift the cabinet. You may need a pry bar for stubborn units.
Additional Considerations
- Check for hidden nails or brackets.
- Be cautious of nearby tile, trim, or flooring that could be damaged during removal.
Section 5: How to Remove Cupboards and Built-in Units
Cupboards are often simpler to remove than fully integrated cabinetry but may still require care to avoid damage.
General Steps
- Inspect for Screws or Nails: Determine how the cupboard is fixed to the wall or floor.
- Remove Trim and Accessories: Detach moldings or baseboards with a pry bar.
- Loosen and Extract: Use appropriate tools to remove fasteners, then lift the unit away from the wall.
Tips for Reuse
- Label doors and shelves during disassembly if you intend to reinstall the cupboard.
- Store parts flat and out of moisture-prone areas.
Section 6: Clean-Up and Disposal Options
After removing kitchen cabinets, responsible disposal is essential, especially for residents in areas with strict waste management rules like St Albans.
Disposal Methods
- Curbside Collection: Check with your local council about bulky item pickups.
- Recycling Centers: Take salvageable wood and hardware to a recycling depot.
- Donation: Offer usable cabinets to local charities, renovation centers, or community workshops.
- Skip Hire: For large renovation jobs, renting a skip may be the most efficient.
Environmental Considerations
- Avoid sending reusable materials to landfill.
- Separate out metal handles, screws, and hinges for metal recycling.
- Follow local regulations on treated wood disposal.
Section 7: FAQs and Troubleshooting
Q: What if my cabinets are glued to the wall?
A: Use a utility knife or oscillating tool to cut through the adhesive, and proceed slowly to avoid damaging drywall.
Q: Can I reuse the cabinets I remove?
A: Yes, if you remove them carefully and label all parts, they can be reused or donated.
Q: How do I avoid damaging my backsplash or tiles?
A: Score along edges with a utility knife and use a flat pry bar. Work slowly and evenly.
Q: Should I hire a professional?
A: If your cabinets are complex, heavily integrated with plumbing/electrical, or you’re unsure about safety—yes.
Section 8: Related Projects You Might Like
- How to Prep Walls for New Cabinets
- How to Move and Store Removed Cabinets
- Planning a Kitchen Renovation Timeline
- Removing Old Flooring During Cabinet Demolition
Conclusion
Removing kitchen cabinets is a straightforward but detail-sensitive process. With the right tools, planning, and safety precautions, homeowners can tackle this task themselves. Always assess your situation carefully, and don’t hesitate to seek professional help when in doubt.
For readers in locations like St Albans, remember to check local council options for bulky waste pickup or eco-friendly disposal programs.